ما هي وحدة التحكم الإلكترونية؟
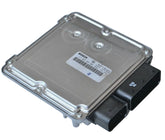
وحدة التحكم في المحرك (ECU) هي الحاسوب الرئيسي في المركبات الحديثة المسؤول عن التحكم في أداء المحرك. تعالج هذه الوحدة مُدخلات المستشعرات وتُرسل الأوامر إلى مكونات مثل حاقنات الوقود، وملفات الإشعال، ومُشغلات الخانق. توجد وحدات التحكم الإلكترونية في جميع المركبات الحديثة، وهي ضرورية لإدارة المحرك بكفاءة وأمان.
هناك أنواع مختلفة من وحدات التحكم الإلكترونية مثل:
-
وحدة التحكم في المحرك (ECM)
-
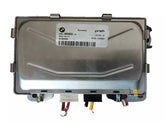
وحدة التحكم في ناقل الحركة (TCM)
-
وحدة التحكم في نظام ABS
-
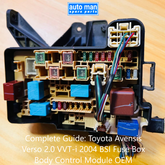
وحدة التحكم في الجسم (BCM)
فهم أسلاك وحدة التحكم الإلكترونية
أنواع دبابيس وحدة التحكم الإلكترونية الشائعة
| نوع الدبوس | وصف |
|---|---|
| مصدر الطاقة (B+) | يوفر طاقة 12 فولت أو 5 فولت لوحدة التحكم الإلكترونية |
| الأرض (GND) | اتصال أرضي للتشغيل المستقر |
| خطوط حافلات CAN | خطوط الاتصال لتبادل البيانات |
| مدخلات المستشعر | مدخلات من أجهزة الاستشعار مثل MAP، MAF، O2، وما إلى ذلك. |
| مخرجات المحرك | أوامر للحاقنات والملفات والصمامات والمرحلات |
يعد التعرف الدقيق على الدبابيس باستخدام مخطط الأسلاك أو مخطط توصيل الدبابيس أمرًا ضروريًا للتشخيص والإصلاح.
الأدوات اللازمة لإصلاح وحدة التحكم الإلكترونية
لإصلاح أو اختبار وحدة التحكم الإلكترونية، يتم استخدام الأدوات التالية بشكل شائع:
-
مقياس متعدد رقمي
-
راسم الذبذبات
-
مكواة اللحام ومحطة الهواء الساخن
-
سجادة مضادة للكهرباء الساكنة وحزام معصم
-
إعداد منصة اختبار وحدة التحكم الإلكترونية
-
مبرمج EEPROM/Flash (MiniPro، KESS، K-TAG، Xprog، إلخ.)
-
ماسح ضوئي أو برنامج تشخيصي OBD2
داخل وحدة التحكم الإلكترونية: المكونات الرئيسية
من المهم فهم مكونات وحدة التحكم الإلكترونية قبل إجراء أي إصلاح. تشمل المكونات النموذجية ما يلي:
-
المتحكم الدقيق/المعالج: ينفذ التعليمات والمنطق
-
EEPROM/ذاكرة الفلاش: تخزن الخرائط وأكواد الأخطاء وبيانات مانع الحركة
-
الترانزستورات / المحركات: مخرجات التحكم إلى الملفات والحاقنات
-
دوائر الاتصالات المتكاملة: إدارة بروتوكولات CAN وLIN وK-Line
-
منظمات الجهد: توفر طاقة منظمة داخلية
ترتبط معظم أعطال وحدة التحكم الإلكترونية بالسخونة الزائدة، أو دخول الماء، أو الدوائر القصيرة، أو المكونات المعيبة مثل برامج التشغيل أو شرائح الذاكرة.
إصلاح وحدة التحكم الإلكترونية خطوة بخطوة
1. الفحص البصري
افتح غلاف وحدة التحكم الإلكترونية وافحصه بحثًا عن المكونات المحترقة أو التآكل أو وصلات اللحام المكسورة.
2. التحقق من الطاقة والأرض
التحقق من جهد الدخل وسلامة الأرض باستخدام مقياس متعدد رقمي.
3. ابحث عن رموز الأعطال التشخيصية (DTCs)
استخدم الماسح الضوئي OBD2 لاسترجاع رموز الأخطاء وبيانات الإطار المتجمد.
4. النسخ الاحتياطي لبيانات EEPROM وFlash
اقرأ محتوى الذاكرة وانسخه احتياطيًا باستخدام برنامج. هذا ضروري قبل إجراء أي تغييرات.
5. اختبار المكونات واستبدالها
استبدل المكونات التالفة مثل المكثفات ومحركات الأقراص وEEPROMs باستخدام أدوات اللحام.
6. اختبار وحدة التحكم الإلكترونية
استخدم إعداد مقعد محاكاة للتأكد من أن وحدة التحكم الإلكترونية تعمل بشكل صحيح قبل إعادة التثبيت.
أين تتعلم إصلاح وحدة التحكم الإلكترونية؟
مصادر التدريب عبر الإنترنت:
-
أكاديمية ألينتك
-
طارق جميل للتدريب ECU
-
Digital Kaos (منتدى DK)
-
منتدى MHHAuto
-
اتصالات ECU
الكتب الموصى بها:
-
فهم إلكترونيات السيارات بقلم ويليام ريبينز
-
دليل تدريب إصلاح وحدة التحكم الإلكترونية (متوفر بتنسيق PDF)
نصائح السلامة
-
افصل دائمًا بطارية السيارة قبل إزالة وحدة التحكم الإلكترونية أو اختبارها.
-
استخدم الاحتياطات المضادة للكهرباء الساكنة لمنع تلف الرقائق.
-
قم بتثبيت ملفات وحدة التحكم الإلكترونية فقط من مصادر موثوقة لتجنب الفساد الدائم.
-
قم بالتدرب على اللحام على لوحات الدوائر المطبوعة الخردة قبل محاولة إجراء الإصلاحات المباشرة.
هل تبحث عن قطع غيار وحدة التحكم الإلكترونية؟
توفر أوتومان لقطع الغيار تشكيلة واسعة من وحدات التحكم الإلكترونية (ECUs) ووحدات التحكم الإلكترونية (ECMs) ووحدات التحكم بالسيارات (TCMs) الأصلية والمستعملة والمختبرة، بالإضافة إلى وحدات أخرى لعلامات تجارية مثل تويوتا، وبي إم دبليو، ومرسيدس-بنز، وهوندا، ونيسان، وغيرها. جميع القطع تخضع لفحص دقيق وتُشحن إلى جميع أنحاء العالم.
قم بزيارة موقعنا الإلكتروني لاستكشاف مخزون وحدة التحكم الإلكترونية لدينا:
www.automanspareparts.com


